Showing posts with label 2 step owl builder punch. Show all posts

Monday, 7 November 2016

Perfect Plum - befitting for the bride!

hello all

well as its been ages since I posted a card so thought  I would make up for it..
My friend's daughter got married at one of the local golf clubs here and she had chosen as her theme that most royal and regal of colours - Cadbury Purple!

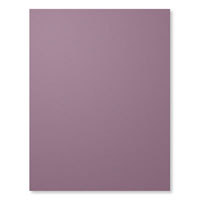
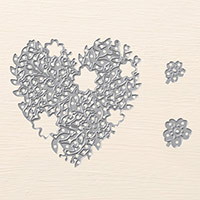
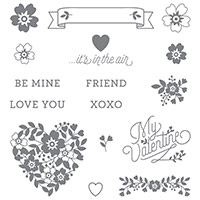
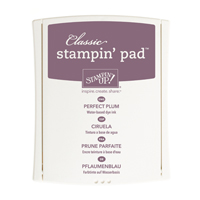
Now am not sure if that is really the correct name for her theme or not, but am sure you get the gist and can instantly visualise the sort of colour I mean here.. So in Stampin' Up! terms I did a bit of a straw pole around a few friends and we decided Perfect Plum would fit the bill as regards the colourway and the Bloomin' Love stamp set and matching Thinlit dies were  just perfect for the card


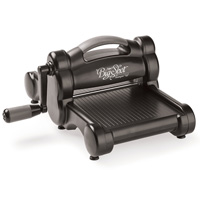
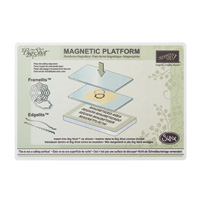
My topper was  white card stock and using the coloured base as I did,  meant I could use the diie-cut heart, replace it back in position so allowing the colour to come through...  and using the Big Shot Magnetic Plate meant I could cut it exactly where I wanted.  The Big Shot Die Brush made very short work of releasing the die-cut heart from the die once I had finished .!

I added some dimension by using a few of the accent pieces from the same Thinlits set
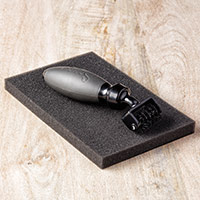
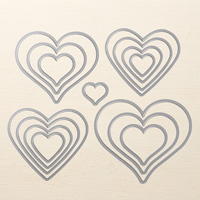
and added a few of the basic pearls for a bit of decoration, and all finished off with some of the little punched hearts from the Owl Builder punch.

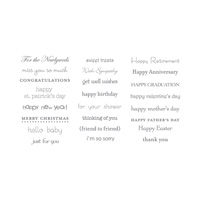
The 'Newly Weds' banner is a staple from the Teeny Tiny Sentiments stamp set and a couple of the nesting dies from the Sweet and Sassy Framelits collection,  was all that was needed to finish the front with the addition of one of the really useful sentiment pairings from Flourishing Phrases.

I kept the inside really plain - just adding 2 more of the smaller nesting hearts and the matching sentiment to compete it.

Very apt I think, don't you.? 


Bloomin' Love, Wedding card

I hope the bride liked it - having known her since she was 6, I can't quite get to grips with the fact that she is now married. I hope they had a truly lovely day.

Stampin' Up! Supplies Used

Just click on the items below to easily access them in my on line store

Or if you wish me to place an order for you, or have any questions please don't hesitate to get in touch

and as promised, next time I shall share some of the lovely swaps I received whist attending a Stampin' Up! demonstrator meeting held in Telford, last weekend.

A great time was had by all and with one of the great perks to being a demonstrator meaning we get to have sneaky peak and play with what is coming - suffice to say - we all enjoyed it.

til next time - have a lovely week and happy Stampin' !

Jan x

Friday, 28 March 2014

'Flower shop' for a special birthday!

hi all

well - last time I ventured to post, I was seen headed for Nottingham for a weekend course - Honest, contrary to popular belief, I did come back, but with a new machine under my arm.
... and have spent the last few weeks familiarising myself with it before I go trotting off again mid April to learn more about what it can do..

but its  been put away for the moment and am back to filling the space on my desk with inks, stamps and card stock, just for a delightful change!..

and had a reason for doing so - a birthday card for a special friend!

There are only 2 real main colourways - Rich Razzleberry and Blushing Bride, with  tiny touches of Wild Wasabi bits of leafy trim!

She adores flowers and am convinced she buys them the way I buy tea bags!  i.e. lots of them!

So I opted to base my card round the 'Flower Shop' stamp set, using the 2 step owl punch for the leaves. Have just realised as I look at it,  that everything is based round 3's! Perhaps it's 3 for luck - let's hope so!

but as a result I thought I would enter it into the current challenge over at 'Less is more' where they want to see 'Three of something' on our cards.

This is what I settled on in the end - though it does look a little darker than in real life I have to say!

Flower Shop


The sponged card topper I embossed with the Chevron embossing folder, and added a strip of trim,  stamped with the Very Vintage jumbo wheel for surface interest. All, finished off, as always, with a few rhinestones... what I shall do if they ever discontinue these - am not quite sure!  Start hoarding now, am thinking!

The sentiment was one from the Label Love stamp set - the matted effect easily achieved with the matching Artisan punch. 

...and inside -  I just partially stamped a couple more of the flowers to lift it from plain to interesting, and chose a stamp from the now retired (sadly!) stamp set Language of Friendship for the inner wording..  stamped exactly where I wanted it with the aid of the
stamp-a-majig to ensure perfect placement.

Flower shop

Stampin' Up supplies for this card:
Stamp / Jumbo Wheel sets :Flower Shop, Language of Friendship (retired),
Very Vintage jumbo whee
Inks: Rich Razzleberry and Blushing Bride
Card stock: Rich Razzleberry, Blushing Bride, Wild Wasabi
Punches: Artisan Label Punch,  Owl builder punch
Other Essentials: Stampin' Up dimensionals,  sponge daubers, 
basic rhinestones, stamp-a-majig

I can order Stampin' Up Products for you, shipped straight to your address and am happy to answer any questions you may have - if you would like to find out more or would like to place an order you can email me or contact me on 01438 820829

or why not visit my online store 
 (currently, for every £45 spent, choose a free sale-a-bration gift - but  only available for a few more days as it finishes March 31st.

Well as am not the best getter upper in the world, and this Saturday night/Sunday morning sees the clocks go forward, every year I think I ought to do a dry run tonight instead.  Hopefully then, by Monday morning,   at what to me should still really feel like 5:15 - won't seem so bad with a 24 hour advance tryout! Well we can live in hope.

Happy Mothering Sunday to all Mum's everywhere - and  we shall be making a lovely fuss of ours!  at 81, we have decided we will keep her after all!

til next time - have a lovely week.

Jan
x

Sunday, 29 September 2013

Colour Co-ordination in one easy lesson ! - Anniversary greetings...

Well, with my eldest nephew's wedding anniversary fast approaching  and following on the theme of co-ordinating a card to the colour scheme they had on the day  - it was an easy task for me as Stampin Up is co-ordination with a Capital 'C'!

From the punched shapes, to the cardstock, to the backing papers and embossing folders and embellishments - they have them all.

My choice was governed by their's - and Island Indigo as the main colour just fitted the bill, and offset against white. I think it all worked perfectly together. This is what I came up with,  and apologies for the photographs!


Whisper white for the card with a matted/layered centre panel of Island Indigo topped with a strip of toning paper from the Quatrefancy DSP range.

I punched a series of mosaic shapes, topped these with the small heart, and finished the sides of the card with the smaller hearts using the two step owl punch.

My sentiment was layered on strip of white cardstock, run through the hearts embossing folder. I sponged the edges prior prior to making a small snip at each side to help locate the baker's twine trim.

... and to finish the inside I just opted to stamp a little heart at the top right just to tie it all in with the hearts theme I had used everywhere else -  leaving me plenty of space to write them a little congratulatory note..

Hope they liked it.

Things I used to make this card:

Stamp set: although mine are no longer available - any suitable sentiment would do
Inks : Island Indigo
Cardstock  and paper: Whisper White, Island Indigo, Quatrefancy DSP
Punches: Mosaic Punch, Small Heart punch, 2 step owl builder 
Embossing folder: Little hearts from the Adorning Accents set
Other essentials: Stampin up Dimensionals, baker's twine

I can order Stampin Up products for you, shipped straight to your address and am
happy to answer any questions you have  - if you would like to find out more or would like to place an order you can email me or phone me on 01438 820829


Sunday, 25 August 2013

Anniversary wishes - hearts glaore

hi all

Well its back to routine for me now, for the next couple of weeks at least. Since my last post have been away on holiday followed by celebrations for my birthday  - and also  been sent away - well no, not literally, just to one of  our other site offices in Bristol to train some new starters.

Nice as it is to be away - no time for crafting of any kind unfortunately - so now am back I have some catching up to do.

First on the list - an anniversary card  for my youngest nephew and his wife. They got married on a glorious sunny day so crossing fingers their anniversary will be a repeat!.

I raided my scrap box and chose green/pink colour ways for their card -  reminiscent of the bride's colour scheme for the day and left it really plain - just a cascade of punched hearts in various papers, which I mounted on card to give each of them them a bit of stability.  


 A stamped sentiment complete with tiny heart popped up on my beloved Stampin up dimensionals, toning ribbon trim and some sponging around the card edges to finish. 


 I did see this idea on-line and would so like to thank the originator but of course now can't find it... so my apologies to the lovely lady!


Inside - well they say necessity is the mother of invention - despite my lining up the stamp to be straight or so I thought   - it still seemed marginally off to me - and the more I looked  the worse it seemed.

So in desperation I opted to redo it and mount the sentiment instead, using my Windows framelit dies to cut the shape and just traced round the outer edge of the die to give me a guideline for fussy cutting my matching mount.

 Though my cutting is far from perfect,  it was the look I wanted and I used this to cover the original stamping.

All finished with a tiny stamped heart and a bit of bling.  I tried to colour the rhinestones with my markers but in the end just punched some teeny green circles using the 2 step owl punch and stuck the rhinestones on top of them. If I look carefully , well there is a hint of green, if nothing else.

I hope they like it.

Things I used to make this card:

Stamp sets: although mine are no longer available - any suitable sentiment would do
Inks : Pear Pizzazz, Pink Pirouette
Cardstock  and paper: Whisper White, and scraps of toning pinks and greens
Punches: Heart punch and 2 step owl builder
Other essentials: Stampin up Dimensionals, rhinestones, Windows framelit dies, taffeta ribbon

I can order Stampin Up products for you, shipped straight to your address and am
happy to answer any questions you have  - if you would like to find out more or would like to place an order you can email me or phone me on 01438 820829


Related Posts Plugin for WordPress, Blogger...