hi all
well just a little card this week - very little in the way of stamping - more an exercise in co-ordination and how Stampin Up make that so easy.
With everything in the Stampin Up catalogues described in such a way so you know what compliments what - whether its a stamp set, a particular punch, a set of dies for shape cutting or what colours co-ordinate with a designer series paper pack - they list it all.
- so no guess work involved on your part and you know your finished item will look stunning.
That was the case here - I chose Pear Pizzazz for my colour base for this good luck card, matted on Very Vanilla cardstock, and topped with toning designer series paper.
Come and see what I managed to make with a few scraps.
 I did make use of both current and retired papers I had in my snips box, punched a set of 4 little hearts to make my 4-leafed clover and used the 'So Happy for You' set for both the stalk and the Good luck' sentiment.
Although now retired, another favourite which I do keep close at hand!
...but of course you could easily substitute all these for items of your own.
A bit of sponging round the edge and paper piercing to add some interest, along with my beloved rhinestones for a bit of bling. All finished off with a seam binding/brad bow, and the top layer popped up on Stampin Dimensionals.
I did make use of both current and retired papers I had in my snips box, punched a set of 4 little hearts to make my 4-leafed clover and used the 'So Happy for You' set for both the stalk and the Good luck' sentiment.
Although now retired, another favourite which I do keep close at hand!
...but of course you could easily substitute all these for items of your own.
A bit of sponging round the edge and paper piercing to add some interest, along with my beloved rhinestones for a bit of bling. All finished off with a seam binding/brad bow, and the top layer popped up on Stampin Dimensionals.
 If you look closely you can see I also went just a tiny bit dot happy with my Crystal Effects and Dazzling Diamonds stamping glitter -
... well you can't have enough glimmer and glitter in my book!. I decorated the inside with a strip of paper punched with my dotted scallop ribbon punch, just to lift it a bit.
I do love the way it all went together, knowing that everything just goes!
If you look closely you can see I also went just a tiny bit dot happy with my Crystal Effects and Dazzling Diamonds stamping glitter -
... well you can't have enough glimmer and glitter in my book!. I decorated the inside with a strip of paper punched with my dotted scallop ribbon punch, just to lift it a bit.
I do love the way it all went together, knowing that everything just goes!
I hope you like it.
Things you need to make this card:
Stamp set: A Word for you
Inks: Pear Pizzazz
Cardstock and paper: Very Vanilla, Pear Pizzazz, co-ordinating scraps of designer series paper
Punches: small heart punch, dotted scallop ribbon border punch
Other essentials: Stampin up Dimensionals, sponge daubers, Piercing pack and piercing tool, seam binding and a toning brad for the bow.
I can order Stampin Up products for you, shipped straight to your address and am
happy to answer any questions you have - if you would like to find out more or would like to place an order you can email me or phone me on 01438 820829
Until next time and hope everyone is enjoying our lovely weather.
Jan
x
just to add... this was for my lovely sister who is partway through a college course and just heard she has been offered a 2nd interview for a job to follow.
So we are all jumping about here and crossing finges, toes, and anything else that comes to mind - in the hope that she is successful.
hi Everyone
I have my lovely work colleague Sandie to thank for the inspiration for this card.
Thanks so much, Sandie. x
Triple
time stamp? Well you might well ask.!
its certainly in 3 pieces, but instead of the recognised technique of stamping the image over a stack of 3 pieces of card then
matting each of the layers, size up on the card base, I stamped the
images on one sheet and cut that into 3 pieces and just stuck those onto
my card base - the lazy alternative?.
Come and take a look.
I used
the lovely Summer Silhouettes stamp set - practically used every stamp
in the set I think, apart from the smallest one. I started with one
column of leaves, first stamped off, then fully inked, and then just
went round the card having a great time filling in the gaps with the
other stamps... and this time I even decorated the inside to match.!
I
rounded the 4 corners before cutting the stamped image apart, finishing them by sponging the edges of each of the resulting cut panels.
The
sentiment is from the A word for You stamp set - just love this one and I do use it such a lot. Again I sponged its edges and popped it up on
Stampin up dimensionals after having been at the super snips perfecting
my fussy cutting skills..( my lovely upline Vicky would be proud!)
To balance the card I opted for 3 little rhinestones - as thought it needed something up there in that top left hand corner. What do you think?
Perhaps
this is 'half triple time stamping' - Am chuckling here as it almost
sounds like that tap dance step which gave me great grief when I was trying to learn it!
Things you need to make this card:
Stamp set: Summer Silhouettes, A Word For You
Inks: Tempting Turquoise, Melon Mambo, Crushed Curry, Garden Green
Cardstock and paper: Very Vanilla
Other essentials: Sharp snips, Stampin up dimensionals, sponge daubers
I can order Stampin Up products for you, shipped straight to your address and am
happy to answer any questions you have - if you would like to find out more or would like to place an order you can email me or phone me on 01438 820829
thanks for taking the time to stop and have a look
Jan
x
hi all
after all the excitement of the last 2 days it was back to basics for me in my little stampin space.
I made one of the small pizza style boxes, sized to take a set of 3 x 3 thank you cards, complete with 4 of the said cards.
With so many tutorials and videos available on how to make such a box, I couldn't resist finally having a go myself. I finished it with a matching scallop trimmed belly band, just about visible, and a ribbon bow held in place by a couple of super strong glue dots.
I chose the ' Bright Blossoms' stamp set coupled with the Thank You sentiment from 'A word for You' to complete my cards.. all were coloured using my Stampin write Markers.
... am only sorry I did not take advantge of placing an order for myself, for the matching Summer Smooches Designer series paper before it retired - as would have just finished off my box I think - but as it was, I used a piece of toning polka dot paper and ribbon trim.
I was really pleased with the result and can see me making some more.
Things you need to make these:
Stamps: Bright Blossoms, A Word for You
Stampin Write Markers : Daffodil Delight, Wild Wasabi, Melon Mambo, Pacific point
Cardstock: Daffodil Delight, Wild Wasabi, Melon Mambo, Pacific point.
Other Essentials: glue dots, something to trim the box and a border punch to finish the edges of the belly band.
I can order Stampin Up products for you, shipped straight to your address and am
happy to answer any questions you have - if you would like to find out more or would like to place an order you can email me or phone me on 01438 820829
Thanks for taking a look
Jan
x
hi all
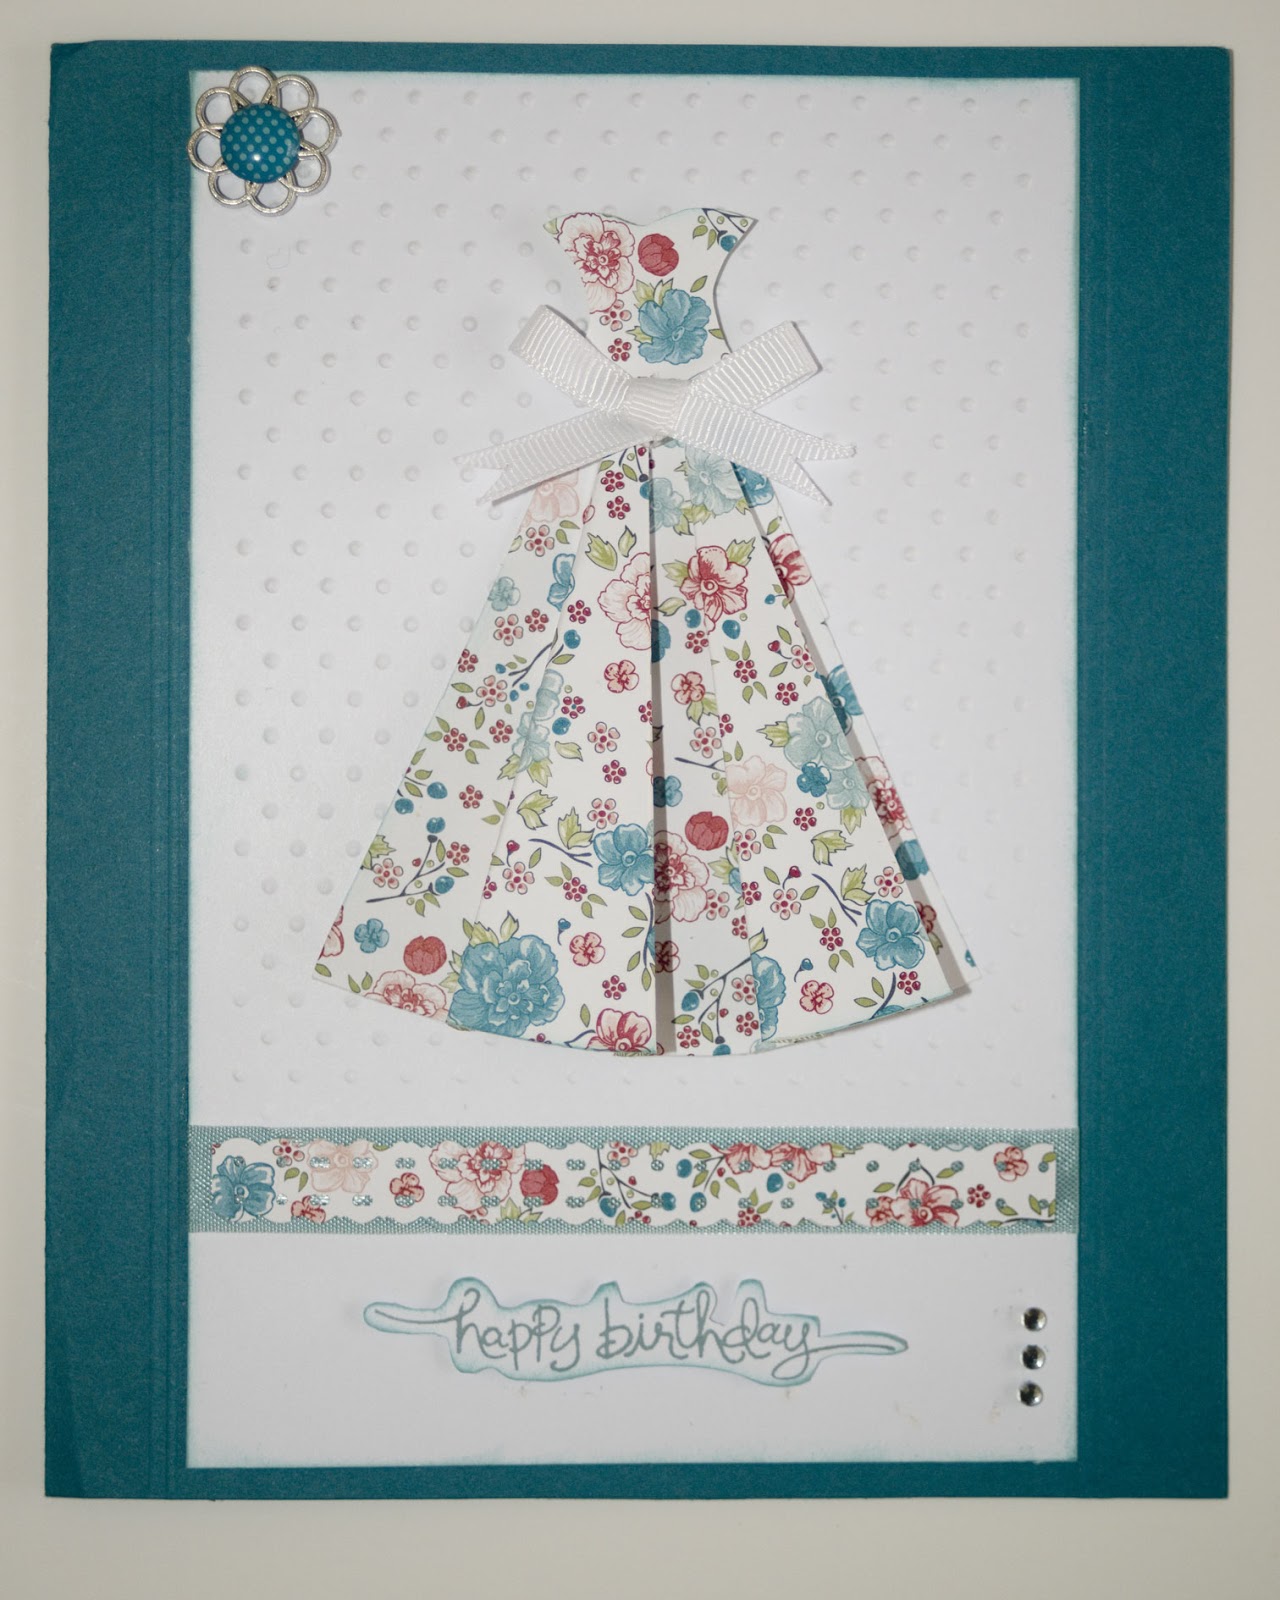
Well sadly am almost at the end of my supply of the lovely 'Twitterpated' designer series paper - but luckily have enough for one last birthday card I need to complete for this month, for a dear work colleague's birthday. It echoes one very similar that I made for my lovely 'baby' sister, though I opted not to post that one, as it is special to her.
But this one really is a card of bits and pieces. It is even an odd size as I just chose to use what I had, from the very last bit of seam binding to the filigree designer brad with its current in-colour centre (Island Indigo) ... but feel very virtuous in using them up.!
But do check out the recent Stampin up 2013 colour refresh - Island Indigo they are keeping as they are now including this as one of the colours in the Regals collection.
I know the pattern for this is widely available but it ties together another of my interests, dressmaking - so couldn't resist having a go myself.....
Come and see.

I have my lovely upline Vicky to thank for inspiration here for two of the elements. Both the scored lines either side of the main panel and the fussy cut sentiment - keen favourites of Vickys I know. (Though neither of which are at all that clear due to my poor photography!)
Though for me, the latter was also borne out of necessity. But as they always say 'there are no mistakes., just design features' and this was certainly that.
I had tried to selectively ink just the part of stamp I needed but of course in my enthusiasm, inked more than I meant to. I used my Stamp-a-majig to ensure perfect positioning but when I stamped it, there were a few stray dashes and dots!
So stamped another copy and used my Stampin up sharp paper snips to cut it out. I inked the edges and popped it up on dimensionals on top of the original stamped image to complete my rescue operation.
I sponged the main panel and trimmed it using my dotted scallop ribbon border punch, matted on top of a strip of Baha Breeze seam binding and added a bit of bling!
...This time I also did decorate the inside to match.!
Things you will need to make this card:
Stamps: A word for you
Ink: Baha breeze (Retiring), Island Indigo
Card stock: Island Indigo, Whisper White and Twitterpated Designer Series Paper
Punches: Dotted Scallop Ribbon border punch
Other Essentials : Stamp-a-Majig, Polka Dot embossing folder, Whisper White taffeta ribbon, Baha Breeze seam binding (retiring), Stampin Up Paper Snips; 2011 - 2013
in- colour designer brads
I can order Stampin Up products for you, shipped straight to your address and am
happy to answer any questions you have - if you would like to find out more or would like to place an order you can email me or phone me on 01438 820829
so til next time
very best wishes all
Jan
x