Showing posts with label Stamp-a-Majig. Show all posts

Monday, 13 January 2014

Water colour designing and sneaky peeks !

Well things just could not get easier than this.!

I have used a card from the up and coming Watercolour Wonder Designer Note cards teamed with two of the stamps from the Happy Watercolour stamp set for a notelet for a friend.

Both will be available in in the new Spring Summer Catalogue available from the 28th January.

See how the little orchid stamp fits the aperture perfectly.! Perfectly positioned with the help of my stamp-a majig.

A few strokes - literally,  of some toning Stampin Up markers and the card was done.

I opted to hand try to hand colour the sentiment as well as a sort of gradient effect - but not too sure about that I have to admit,  though the rest of it I I was very happy with and in just a few minutes I had a card ready to pop in the post.

No need to even get out my beloved Envelope Punch board this time, either  - the notelets come ready packaged with a set of envelopes to go with. To quote that well known meercat - 'simples'! 

I can order Stampin' Up products for you, shipped straight to your address and am
happy to answer any questions you have  - if you would like to find out more or would like to place an order you can email me or phone me on 01438 820829

or why not visit my on-line store.
 
Am currently listening to the wind and rain out there - and it sounds quite wild- again!.. somehow venturing out into that lot is not a pleasant thought so hopefully things will have calmed down a bit when its time to go out tomorrow morning.  Stay safe everyone.


Best wishes all and see you next time

Jan
x

Saturday, 13 July 2013

Happy Saturday Everyone!

hi all

As it has been such a fabulous week for us here in the UK with the weather - well, 'Happy Day' just needed to be well and truly wished to everyone.


As I used the current sketch from Mojo Monday (301)for my inspiration it felt rude not to enter it for this week's challenge - which I have to say is my very very first one, never having had the courage to do so before. 


You can see what I came up with.
I opted to use the Happy Day sentiment from the stamp set of the same name, easily placed exactly where I wanted it by using my Stamp-a-Majig.

I used lovely Melon Mambo as my card base with a Whisper White top and different papers from the Gingham Garden Designer Series Paper for the card accent strips. The main piece I also sponged for a bit of definition.

The main flower embellishment came courtesy of the Pansy punch - 3 flowers layered together with a retaining Daffodil Delight brad and leaves from the (now sadly retired!) Blossom petals punch

My oval punches came in handy for the centre medallion which I popped up on some Stampin Up dimensionals.  I punched 2 of the scalloped ones to split apart for the matted frame and finished it off with fussy cut little flowers made easy with the flower punch from the Itty Bitty Shapes Punch pack.

With a bit of Faux stitching round both this and the card edge to finish off.

Things you need to make this card:

Stamp set: Happy Day
Inks: Melon Mambo, Island Indigo, Pear Pizzazz
Cardstock and paper: Melon Mambo, Whisper White, Pear Pizzazz, Gingham Garden DSP
Punches: Pansy Punch, Itty Bitty shapes Punch Pack, Scalloped oval and large oval punches
Other essentials: Stampin up dimensionals, sponge daubers, Piercing pack and piercing tool
  
I can order Stampin Up products for you, shipped straight to your address and am
happy to answer any questions you have  - if you would like to find out more or would like to place an order you can email me or phone me on 01438 820829


...and lastly my most treasured possession on my craft foot square this week just has to be the adhesive eraser.

 Now it may  not look very much and I must admit - I bought it because I  thought perhaps I ought to - not necessarily thinking I would have a great need of it and until today,  am ashamed to say had never used it.

Whoa have I made up for that now - it certainly rescued my card in that I had adhesive over spill on the edges of the melon mambo card stock - the whisper white seemed to attract little balls of it from who knows where and it really sorted both of those out - but more importantly made very short work of cleaning my cutting mat as well - not sure if its meant for that - but it got rid of lots of adhesive from the surface and it really is nice and clean again.   In my book, a definite must have!

Thanks as always and 'happy day' tomorrow, everyone as well.

Jan
x
.

Wednesday, 26 June 2013

Blossom Punching Two-step

hi all

No this isn't an updated Old Tyme dance step - but my endeavours to use  my Blossom Petals punch and matching Build a Blossom stamp set...  and give them a last time airing. I shall be really sorry to have to say good bye to these I have to say.

I needed a thank you card and couldn't resist giving them a final outing for the purpose.
I chose Cherry Cobbler as my colour scheme with Very Vanilla - and with matching ink, toning designer series paper, seam binding, a glimmer brad and oodles of inspiration available on how to do this - I am really pleased with how it all came together.


I 'stamped off' my large petals first on to spare paper and then onto the vanilla card stock to lighten the colour - then stamped them all  again using my stamp-a-majic to line up the more detailed stamp on each of them. I used one of the 'Thank you Kindly' stamps for my sentiment, propped up on dimensionals, and finished it all  with a strip of seam binding and a glimmer brad bow.

I opted to leave the inside quite plain and just used one of the smaller stamps from the set, repeated roughly in a round  to make a small flower, not exactly very visible but its there.!


Things you will need to make this card:

Stamps: Build a Blossom, Thank you Kindly
Inks: Cherry Cobbler
Cardstock: Very Vanilla, Cherry Cobbler,
Punches: Blossom Petals, Large Oval, Scallop Oval
Other Essentials: Cherry cobbler seam binding, glimmer brad, designer series paper stack, stamp-a-majig

I can order Stampin Up products for you, shipped straight to your address and am
happy to answer any questions you have  - if you would like to find out more or would like to place an order you can email me or phone me on 01438 820829

Many thanks for taking the time to have a look

Jan
x

Friday, 21 June 2013

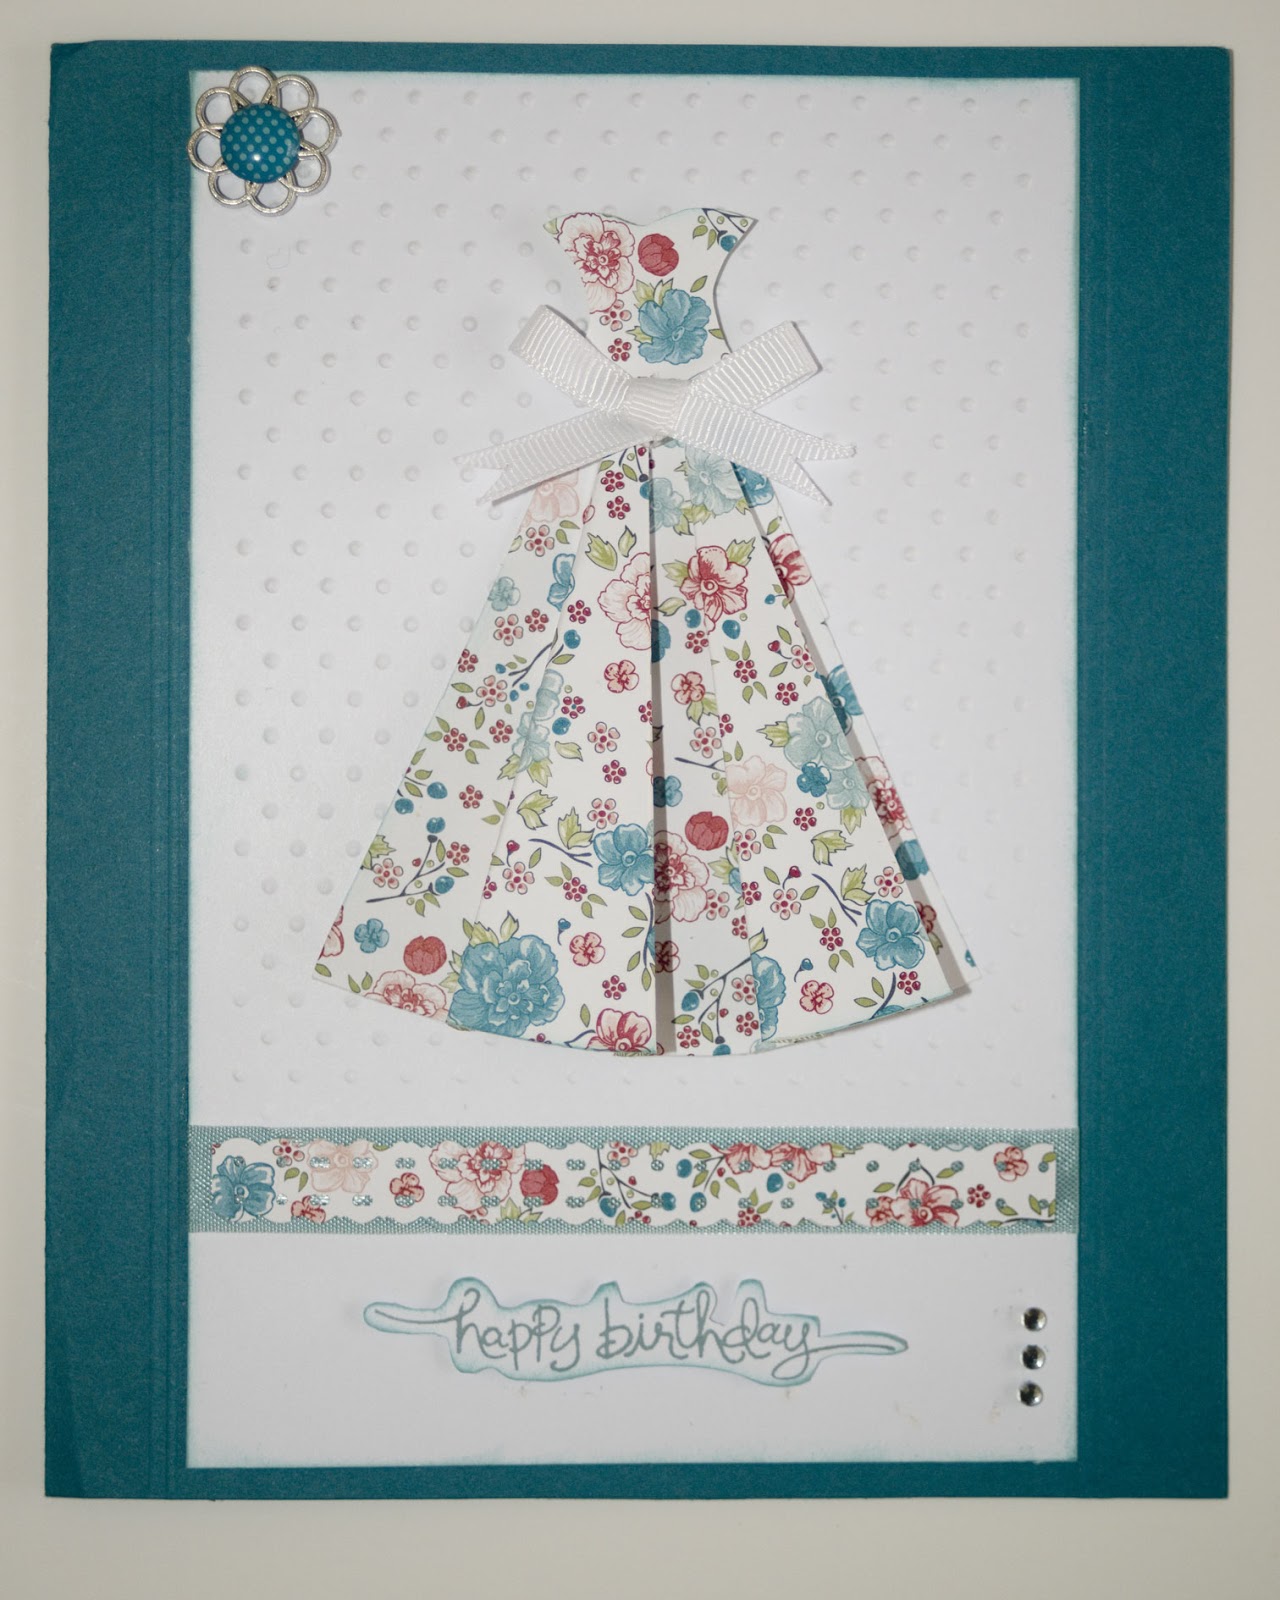
Dressed up to the nine's - and somewhere to go ?

hi all

Well sadly am almost at the end of my supply of the lovely 'Twitterpated'  designer series paper - but luckily have enough for one  last birthday card I need  to complete for this month, for a dear work colleague's birthday.  It echoes one very similar  that I made for my lovely 'baby' sister,  though I opted not to post that one, as it is special to her. 

But this one really is a card of bits and pieces. It is even an odd size as I just chose to use what I had, from the very last bit of seam binding to the filigree designer brad with its current in-colour centre (Island Indigo) ... but feel very virtuous in using them up.!

But do check out the recent Stampin up 2013 colour refresh - Island Indigo they are keeping as they are now including this as one of the colours in the Regals collection.

I know the pattern for this is widely available but it ties together another of my interests,  dressmaking - so couldn't resist having a go myself.....

Come and see.


I have my lovely upline Vicky to thank for inspiration here for two of the elements. Both the scored lines either side of the main panel and the fussy cut sentiment -  keen favourites of Vickys I know. (Though neither of which are at all that clear due to my poor photography!)


Though for me,  the latter  was also borne out of necessity. But as they always say  'there are no mistakes., just design features'  and this was certainly that.

I had tried to selectively ink just the part of stamp I needed but of course in my enthusiasm,  inked more than I meant to. I used my Stamp-a-majig to ensure  perfect positioning  but when I stamped it, there were a few stray dashes and dots!


So stamped another copy and used my Stampin up sharp paper snips to cut it out. I inked the edges and popped it up on dimensionals on top of the original stamped image to complete my rescue operation.

I sponged the main panel and trimmed it using my dotted scallop ribbon border punch, matted on top of a strip of Baha Breeze seam binding  and  added a bit of bling!


 ...This time I also did decorate the inside to match.!


Things you will need to make this card:

Stamps: A word for you
Ink: Baha breeze (Retiring),  Island Indigo
Card stock: Island Indigo, Whisper White and Twitterpated Designer Series Paper
Punches: Dotted Scallop Ribbon border punch
Other Essentials : Stamp-a-Majig, Polka Dot embossing folder, Whisper White taffeta ribbon, Baha Breeze seam binding (retiring),  Stampin Up Paper Snips; 2011 - 2013 
in- colour designer brads 

I can order Stampin Up products for you, shipped straight to your address and am
happy to answer any questions you have  - if you would like to find out more or would like to place an order you can email me or phone me on 01438 820829

so til next time

very best wishes all

Jan
x
Related Posts Plugin for WordPress, Blogger...